A Second Life for the Vinyls of Paulina
2nd Home | Lifestyle
In this week’s DIY, we pimped up Paulina’s vintage decoration. Paulina is a German student studying Leisure and Event management in Leeuwarden. She had seen various pictures on the internet showing vinyls that had been painted, and she fell in love with the idea. Vinyls create a vintage and stylish look and are therefore perfect to use as a room decoration! Even though Paulina wanted to add the special paintings on her vinyls, but she did not trust her painting skills enough to do it herself. That is why she contacted us, and we were happy to help her with our creativity!
KEY-POINTS
Name: Paulina
Study: Leisure and Event Management
Nationality: German
Needs Help with: Old Vinyls
Goal: Make the Room More Cozy
Time: 1-2 Hours
Effort: ●○○○○
Difficulty: ●●○○○
When redesigning and pimping up your rooms or an item of yours it is very important to us to make sure that it fits you and your personality. To make sure that we know exactly how to create an item according to your wishes and your imagination, we create a mood board beforehand. A mood board is an assembly of different pictures, materials, and pieces of text that are supposed to portray a certain mood, look or feel that your item or room is supposed to radiate after the makeover.
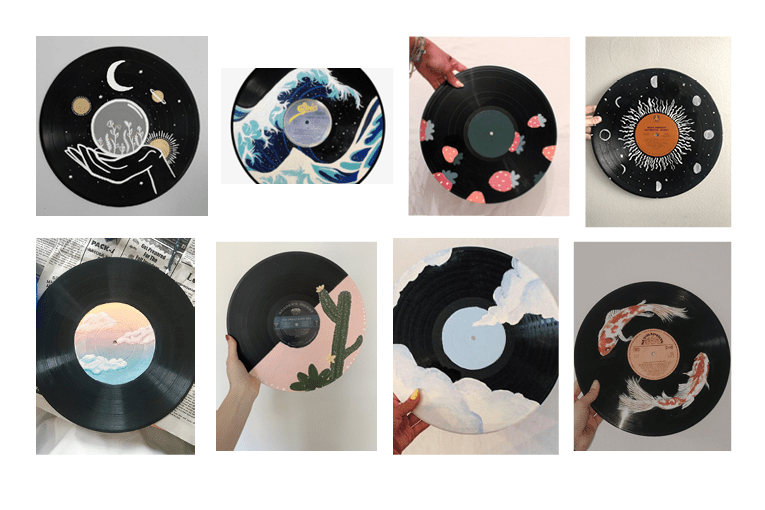
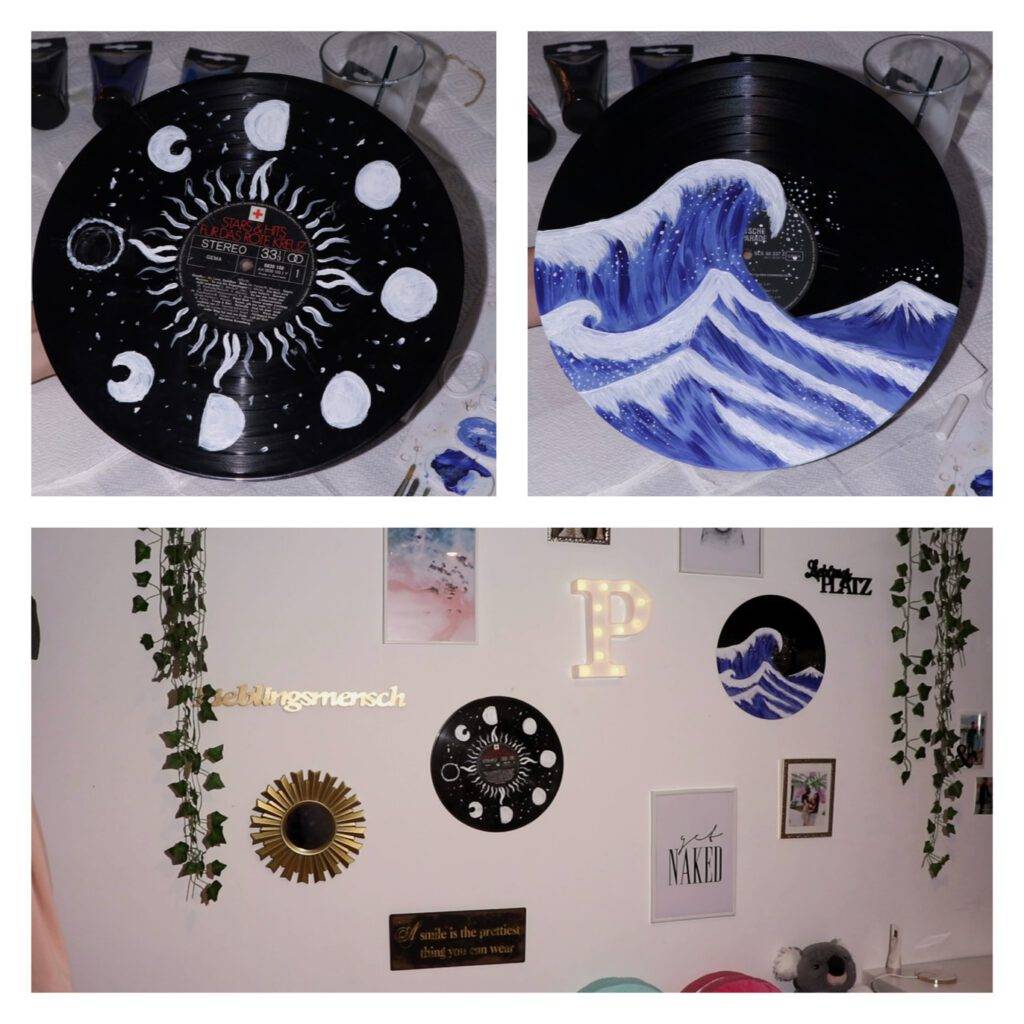
Paulina had two vinyls available for us to use. Those vinyls were for decoration only, because after painting them as we did, they are not usable for music anymore. Paulina sent us pictures of paintings she liked, and we had a look at them. In this DIY we made one painting of a wave and one painting of the moon phases. Those two paintings create a dreamy and chill vibe which was also what Paulina wanted. Of course, you can do anything you like!

As mentioned before, we used two vinyls. We advise you to sketch your idea on the vinyl first, before actually painting. We used chalk for this. For painting, we used acrylic paint in white and multiple shades of blue for the waves. Once the paint was dry, we sprayed the vinyls with a protective clear varnish layer that will make the paint stay on better. Then your work is already done, and you have created new decoration in a fun, easy and creative way! Paulina placed her pimped vinyls on her wall.
We went through the following steps to create the vinyls paintings:
1. Sketch the first vinyl with chalk and add colors on the pallet.
2. Start painting the vinyl.
3. Sketch the second vinyl with chalk.
4. Start painting the second vinyl.
5. Let the vinyls dry.
6. Spray a protective layer on the vinyls.
We are very delighted that Paulina is happy with the end result and that it is according to her wishes. We hope we have inspired you to pimp up your old vinyls and be creative as well.
If you have any request for your room in Leeuwarden, please contact us because we would love to help! Thank you very much for reading and we hope to see you in the next blog!
DO YOU WANT TO PARTICIPATE?
Then send us a short video of you and your challenge for us to: